Upcylced Wall Planter
If there’s one thing I love it’s plant propagation! I always have cuttings floating around in plastic pots that need a more permanent home. If this is hobby you love as well why not make a DIY hanging wall planter to display your plants! This hanging planter is ideal for plant cuttings to grow and flourish and creates a stunning visual presence. For small courtyards or patios where ground space is limited, a wall planter or vertical garden is perfect. They are also a great way to liven up blank walls and fences.
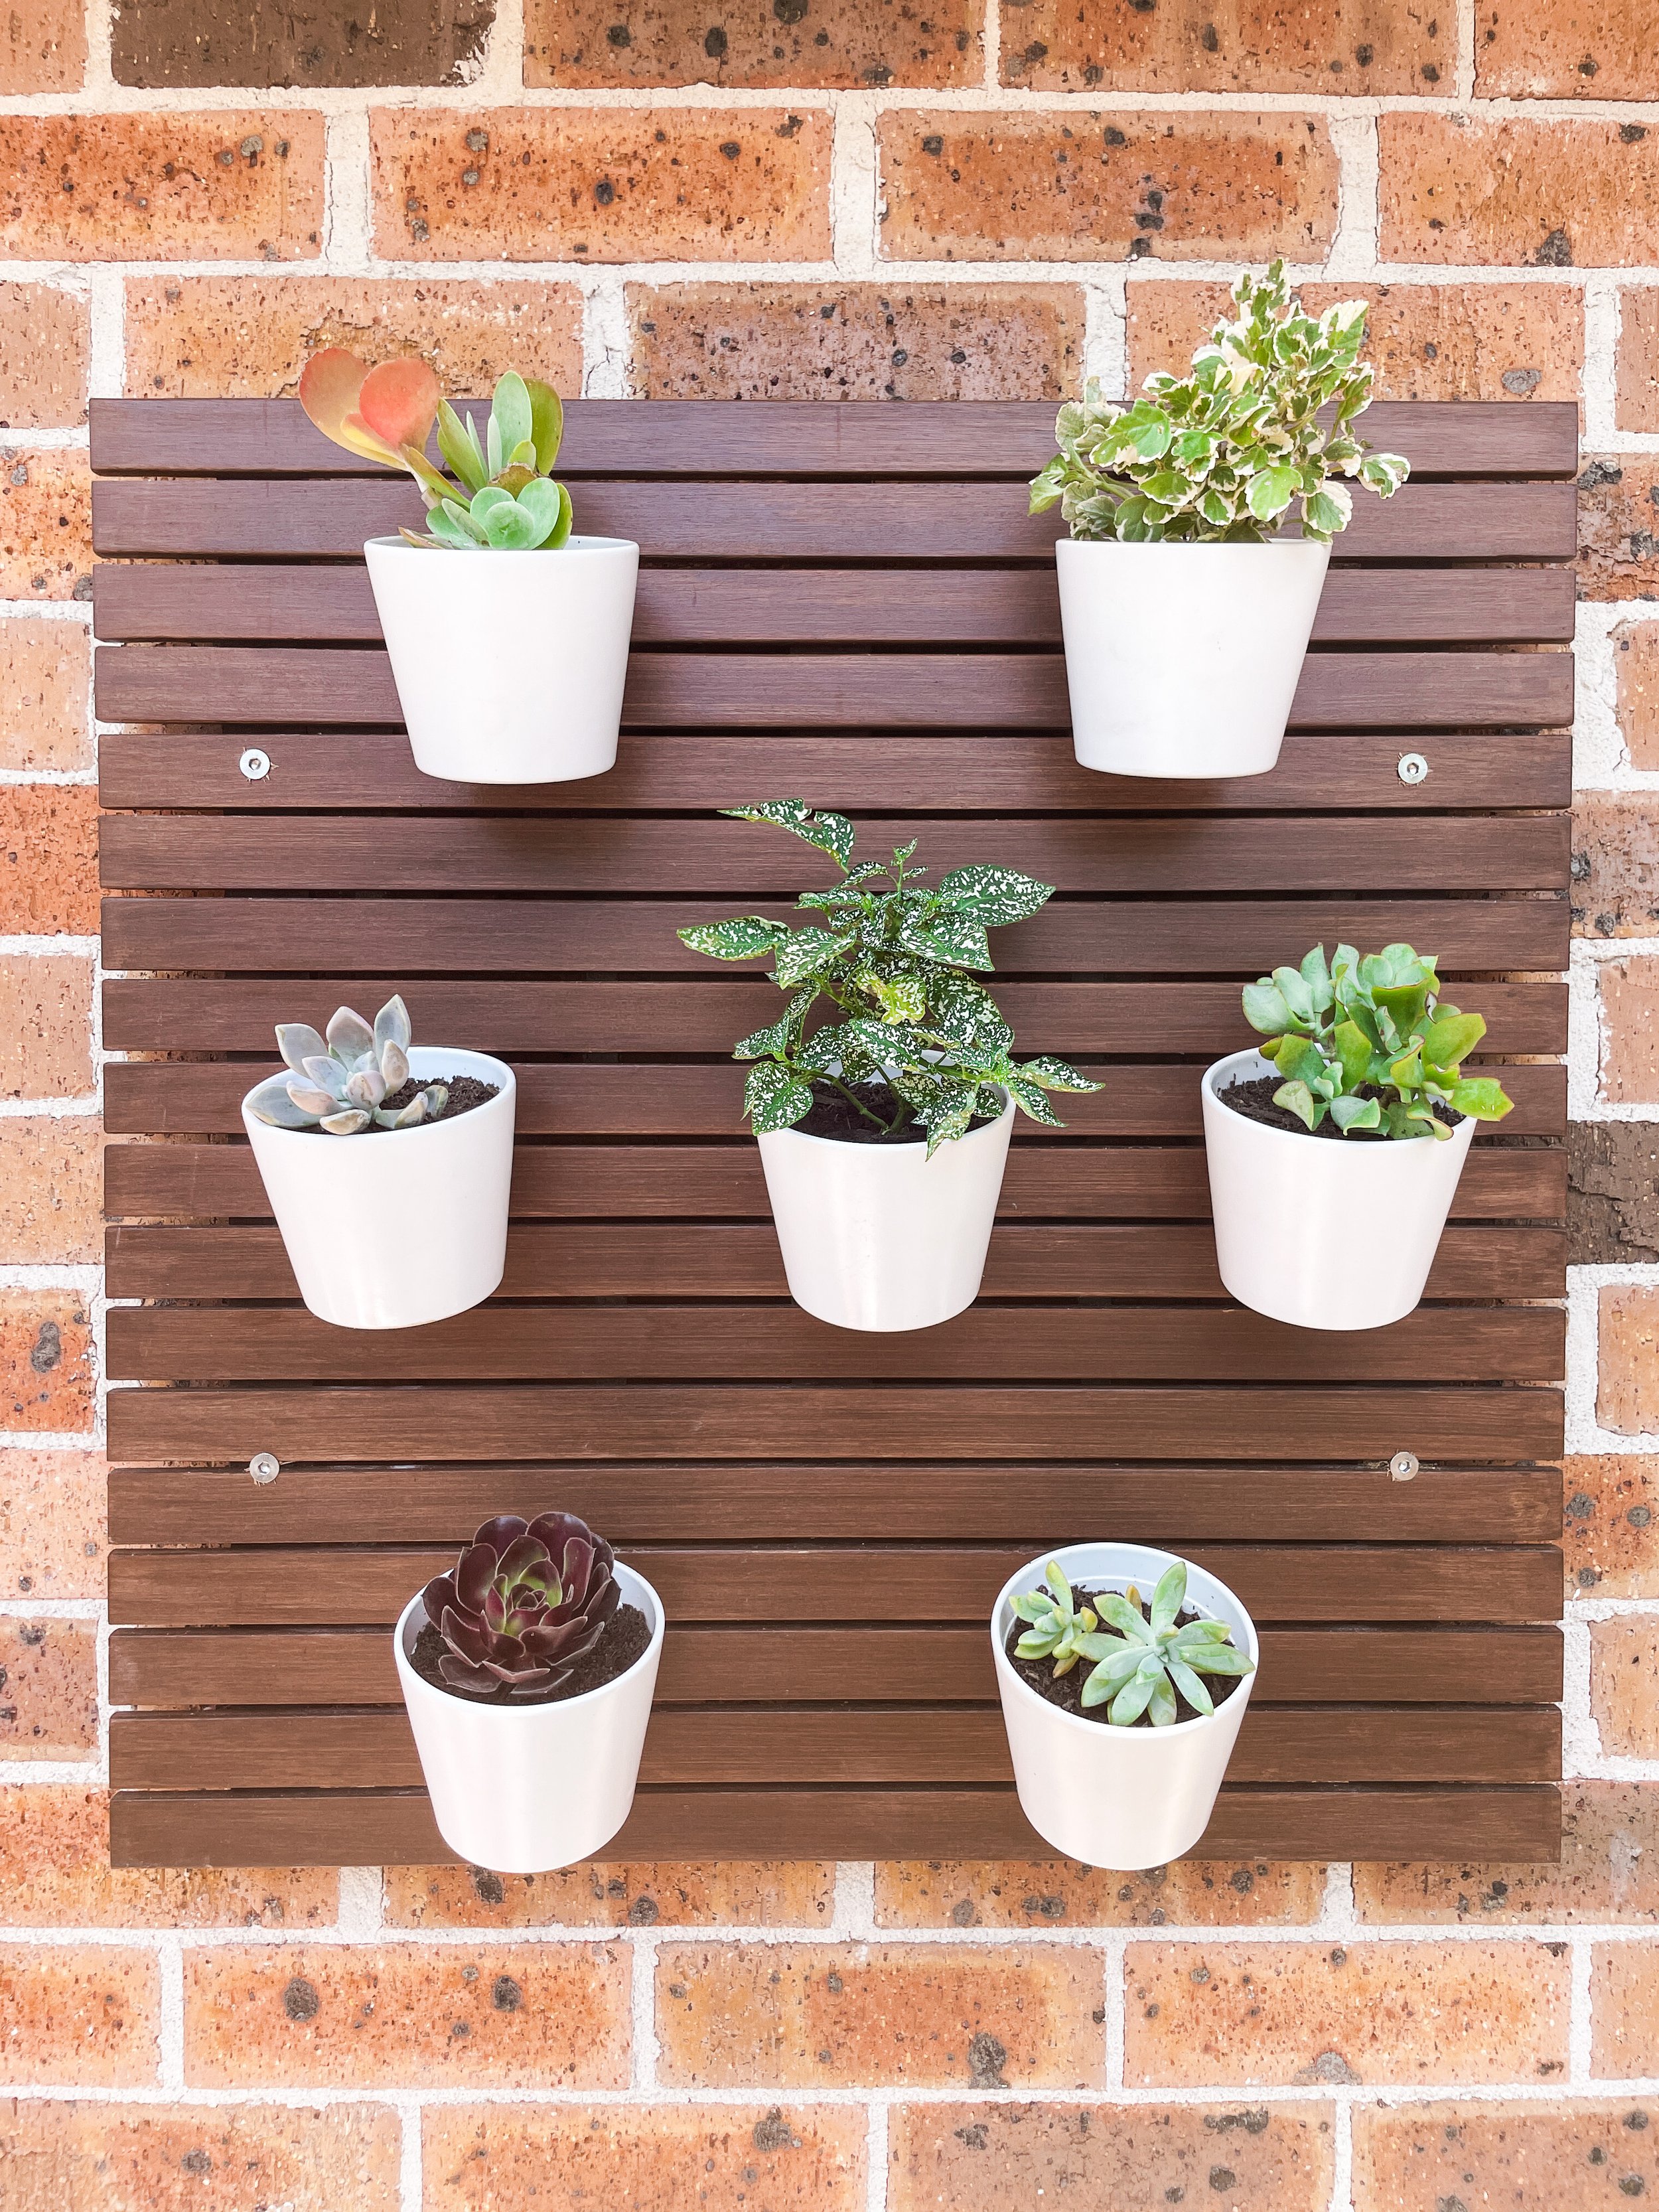
My hanger is made from an old folding balcony table top. You could use something similar with slats ready to go or build your own using leftover fence or decking boards, or even pallet wood.

WHAT YOU WILL NEED
Slatted table top (or any slatted wood that you can hang off)
Sandpaper
Stain/paint
Masonry anchors or screws (for wall mounting)
Optional: to convert pots into hanging pots
STEP 1
Prepare your slatted wood. Mine was the top of an old outdoor balcony table. Sand and apply 2 coats of stain or paint of choice.
STEP 2
You can buy ready hanging pots but I couldn’t find any small enough or in a style I liked so we had to get creative. I found these small ceramic pots at Bunnings and at $1.48 each they were very affordable compared to hanging pots. Lotus 11 x 9cm White Indoor Glazed Cache Pot - Bunnings Australia
To prevent the ceramic from cracking I started with a 2mm drill bit to make a hole in the bottom for the s-hook and repeated this, moving up in bit sizes, until the hole was big enough for the s-hook. To better secure the hook to the pot I ended up using these wire rope grips. Zenith 3mm Galvanised Wire Rope Grips - 12 Pack - Bunnings Australia
If choosing this option, you will need to drill 2 more holes on the side of the pot to fit the wire rope grip. Hold the s-hook in place and mark the spots with a pencil. You can also drill another hole in the bottom of the pot for drainage if required.

STEP 3
Mount your hanger on the wall using masonry anchors and screws, or fixings suitable for your wall.
STEP 4
Now it’s time to add the hanging pots in your desired arrangement and fill with your favourite plants! I went with a variety of succulents, polka dot and Swedish ivy.

